Introduction
When using Unity, we often wish to automate certain tasks to streamline our workflow. These tasks can be simple tweaks to objects to whole debugging systems.
We can achieve these in editor using custom editor inspectors. I myself have recently examples where I have made editor extensions to automate a task, speed up my workflow or debug whole systems
Custom Editor Inspectors for Monobehaviour
By default any Monobehaviour that is attached to a Gameobject will have an editor inspector section. This is quite boring by default but we can easily customise this in a variety of ways.
Method 1: Using Attributes
Unity has some built in attributes that you can use to quickly customise a MonoBehaviours editor inspector without having to even create a new editor class.
Attributes are simply added above the field or class you wish to apply them to (.NET docs page).
Some of these features are:
[HideInInspector]
This allows you to hide a public field from showing in the inspector. This does not prevent unity from serializing it however (which can be useful or a pain)
[Non-Serialized]
This is included in the System namespace from .NET and will prevent a field from being serialized. This will both cause the variable to be hidden and not get serialized by Unity. This is useful to avoid Unity messing with variables even if they are hidden.
[TextArea]
This will make a string instead show a larger multi line input area which is a lot better than the single line default. This can also be used on Arrays of strings and List<string>.
[Header]
This is quite an interesting one, it adds a heading above the field it’s assigned to in the inspector. This can be very useful to organise many fields without writing a custom inspector.
Formatting Example:
1 | [Header("NPC Data File")]<br/>public NPCData NPCData; |
[Tooltip]
A tooltip is text that pops up when a UI item is hovered over with the cursor. This text can be used to give extra information and hints about the item. In this context this is maybe how a variable is used or what it could be set to.
Formatting Example:
1 | [Tooltip("File that contains the NPC data")]<br/>public NPCData NPCData; |
[Range]
Range is a very powerful and useful attribute. This changes the numerical input field into a slider that can go between the two values you specify. This lets you limit the range of a value easily, but this is only limiting the entry in the inspector so i recommend using this in conjunction with a property to limit the values in C#.
Example:
1 | [Range(0,100)]<br/>public float MaxHealth; |
Method 2: Custom Inspector class
Now before you question the title, it is still possible to write a custom inspector easily for a Monobehaviour using certain tools provided by unity already.
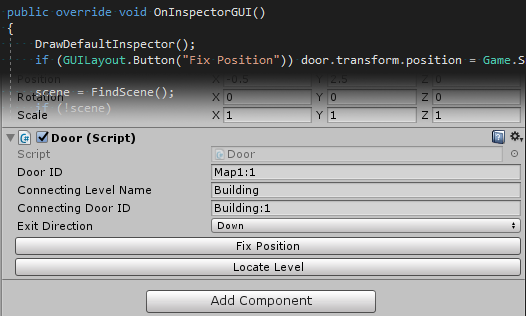
DrawDefaultInspector()
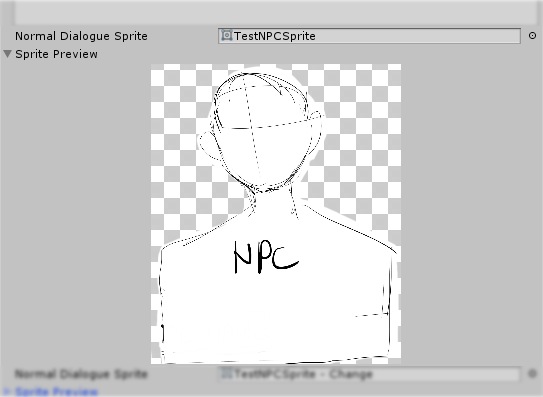
This useful method lets us draw the default inspector that would already exist. This means we can make useful additions such as adding a button or display area or even a sprite without needing to manually code anything that already existed.
This also opens the possibility for having a custom inspector and having a tab or toggle that will reveal and hide the default inspector when it is required.
GUILayoutUtility
A very useful class that provides objects such as a Rect that allows easy formatting of EditorGUI components. An example of this is using GUILayoutUtility.GetRect().
The example below demonstrates this by drawing a texture.
| using UnityEngine; | |
| using UnityEditor; | |
| [CustomEditor(typeof(MyMono))] | |
| public class EntityInspector : Editor { | |
| public override void OnInspectorGUI() | |
| { | |
| MyMono mono = (MyMono)target; | |
| DrawDefaultInspector(); | |
| EditorGUILayout.LabelField("Item Icon: "); | |
| Rect rect = GUILayoutUtility.GetRect(100, 100); | |
| EditorGUI.DrawTextureTransparent(rect, mono.texture, ScaleMode.ScaleToFit); | |
| } | |
| } |