Introduction
Rendering in blender can seem hard at first, but with some basic knowledge, you can create beautiful renders using the Cycles render engine. A good example of this is the image below, the final product of this guide. This post will guide you through creating this render yourself in blender for free using great free assets available on a few websites. You can utilize these websites for other renders in future!
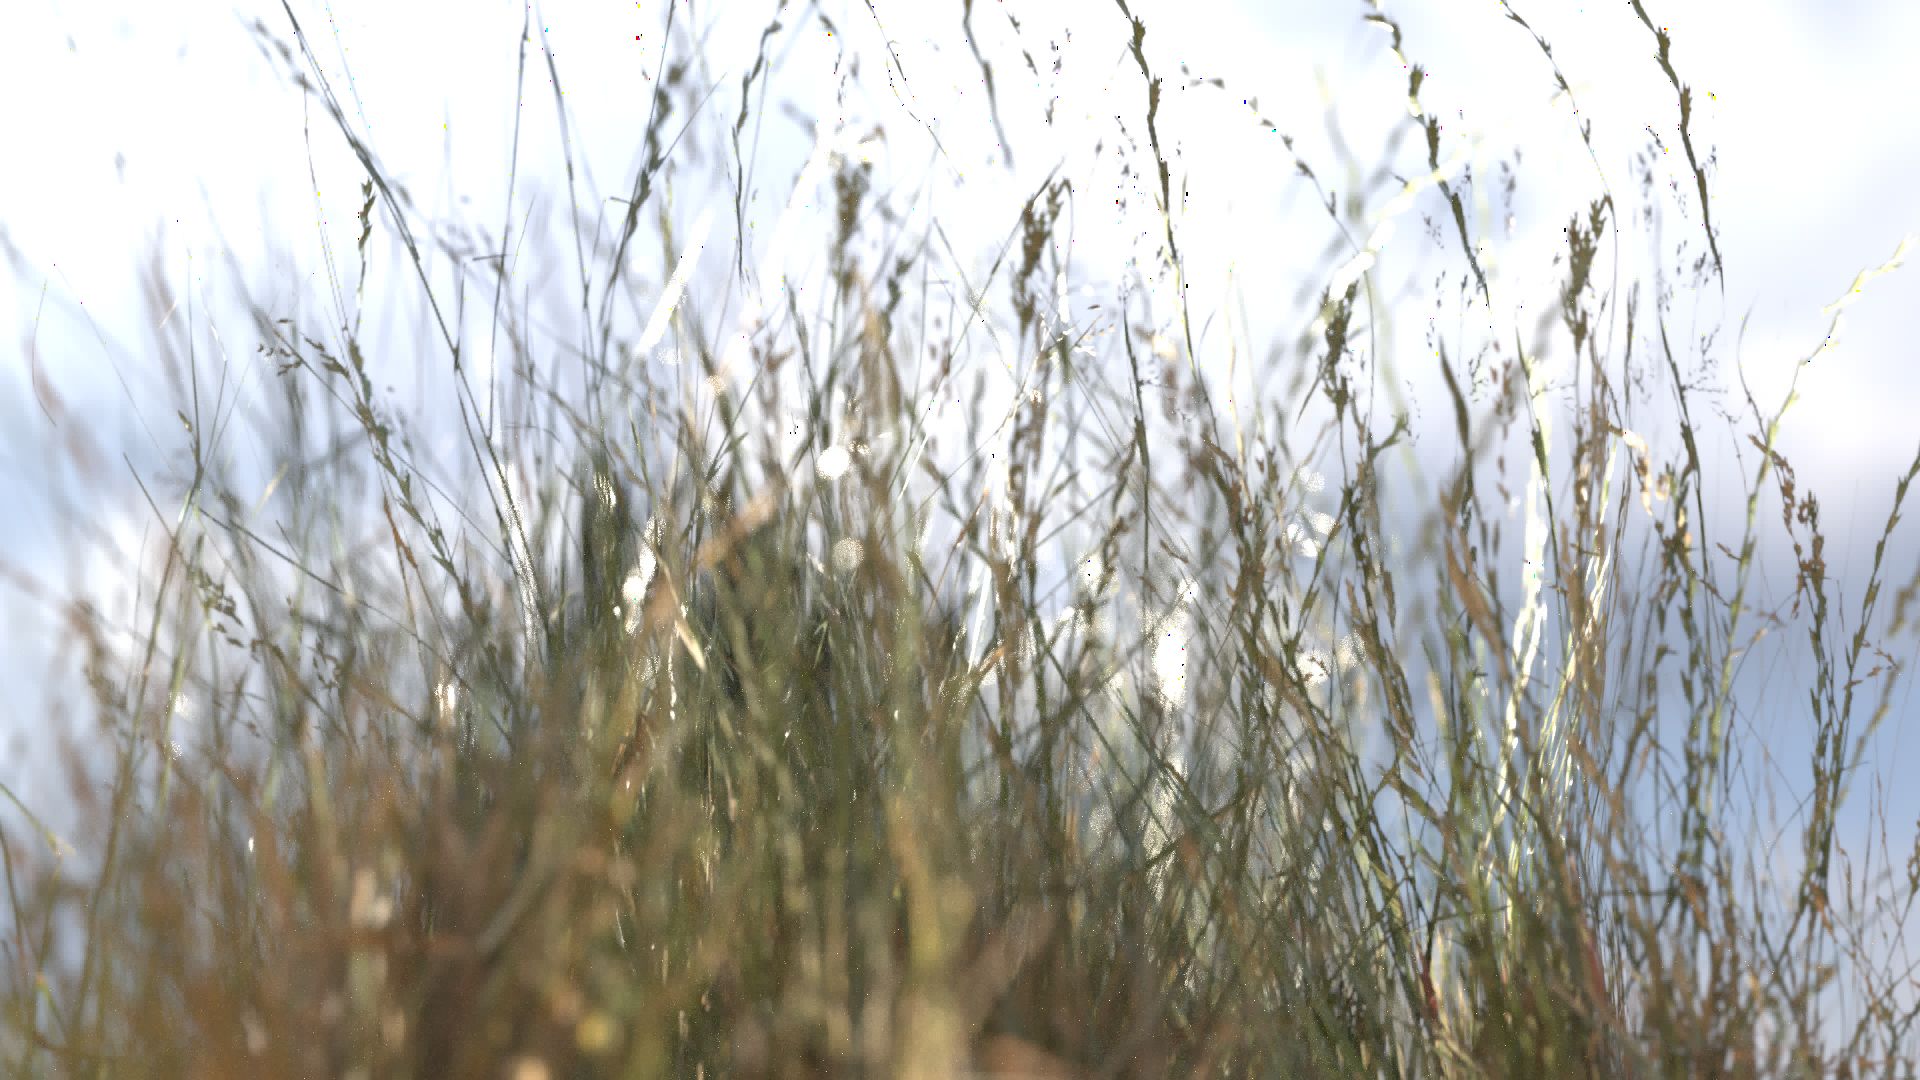
Final Grass Render [View Full Size PNG]
![[View Full Size PNG]](https://robertstraub.co.uk/wp-content/uploads/2018/06/Grass-300samp-noise-reduction.png)
preparation
For those who already know blender basics can continue, but those who don’t should begin by taking a look at the basics of using blender and manipulating meshes in edit mode.
Begin by creating a new blender file. If you have not done so already, enable the Import Images as Planes Addon. This can be done on the Add-Ons tab in the User Preferences dialogue window (File > User Preferences) Tick the Add-On and press Save User Settings and close.

Enabling Import Images as Planes.
Ensure that blender is at least version 2.79 and that you are using the Cycles render engine. This can be changed via a drop down at the top of the window (It will say Blender Renderer by default).
Getting a grass texture [1/3]
First step is to get a few grass textures to use. For this render, I used 2 different textures. It’s important to use varying textures and images in your renders, otherwise the repetitiveness will show and reduce the realism of the render.
I sourced 2 images from textures.com (specifically 3D Scanned Grass Atlas 11 and 3D Scanned Grass Atlas 12) which is a great source for textures and PBR materials. These can be downloaded at a low resolution for free. I specifically downloaded the Albedo, Normal, Roughness and Alpha textures.
Getting a ground texture [2/3]
Next we require a ground texture. This is because we need a surface below the grass to bounce light upwards and create realistic lighting conditions (Indirect light plays a big role in the realism of a render). I chose this Forest Floor texture set from CGBookcase (another great resource for PBR textures). This can be downloaded for free.
Getting a world background (Skybox / HDRI) [3/3]
Lastly we will need to get a background to use. There are a few ways of achieving this, but an easy option is to use a HDRI image or as blender calls it, an Environment Texture. Here I highly recommend using an HDRI as an HDRI image can be used as the only light source in a scene and provide much better results compared to using a single coloured background colour or using the now included Dynamic Sky plugin (but this can still bring good results).
For those who will use a HDRI image, I used the Delta 2 HDRI from HDRIHaven at 8K resolution. This can be downloaded for free.
Scene Creation
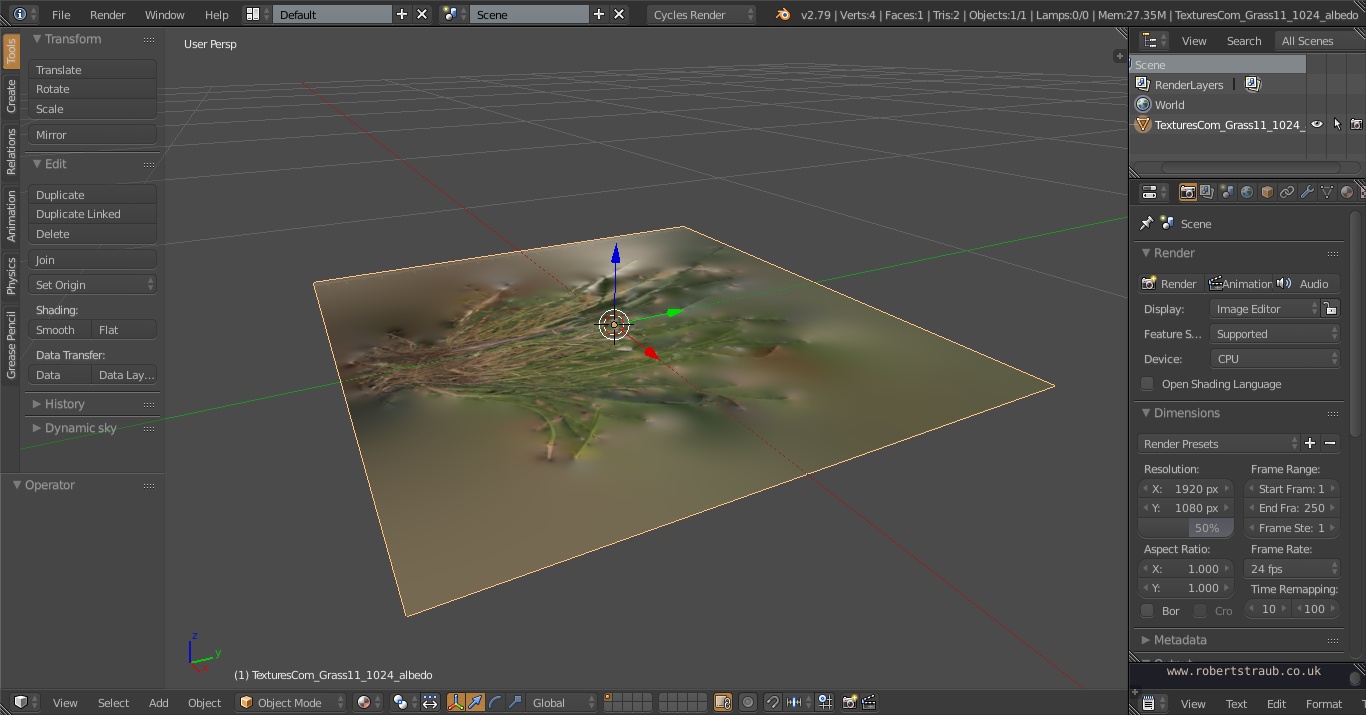
Start by opening blender and having a new scene. Delete all default objects (if there are any). Go to File > Import > Image as Planes. Choose the albedo of the first grass texture you download earlier. After importing, change the 3D view render mode to Material.
The option to Import Images as Planes.
You should see the grass texture on the plane and if the texture came with an alpha channel it should be transparent where appropriate. If however, the texture came with a sepearate alpha texture you will need to fix that by altering the material.
Note: Later before rendering we will use the other downloaded textures to make the material use PBR.
Fixing the alpha
The grass Albedo imported but with missing transparency (missing alpha channel).
We need to edit the material for the new plane. Begin by dragging out a new area in the UI and changing the section to be Node Editor. Ensure that the new plane is the active object. You should see the generated node layout.
Add a new Image Texture node (Add > Texture > Image Texture). Choose the alpha texture for this grass for this new node. Remove the connection from Alpha on the Albedo Image Texture node. Connect the Color output from the Alpha texture Image Texture node to the Fac input on the Mix Shader node.
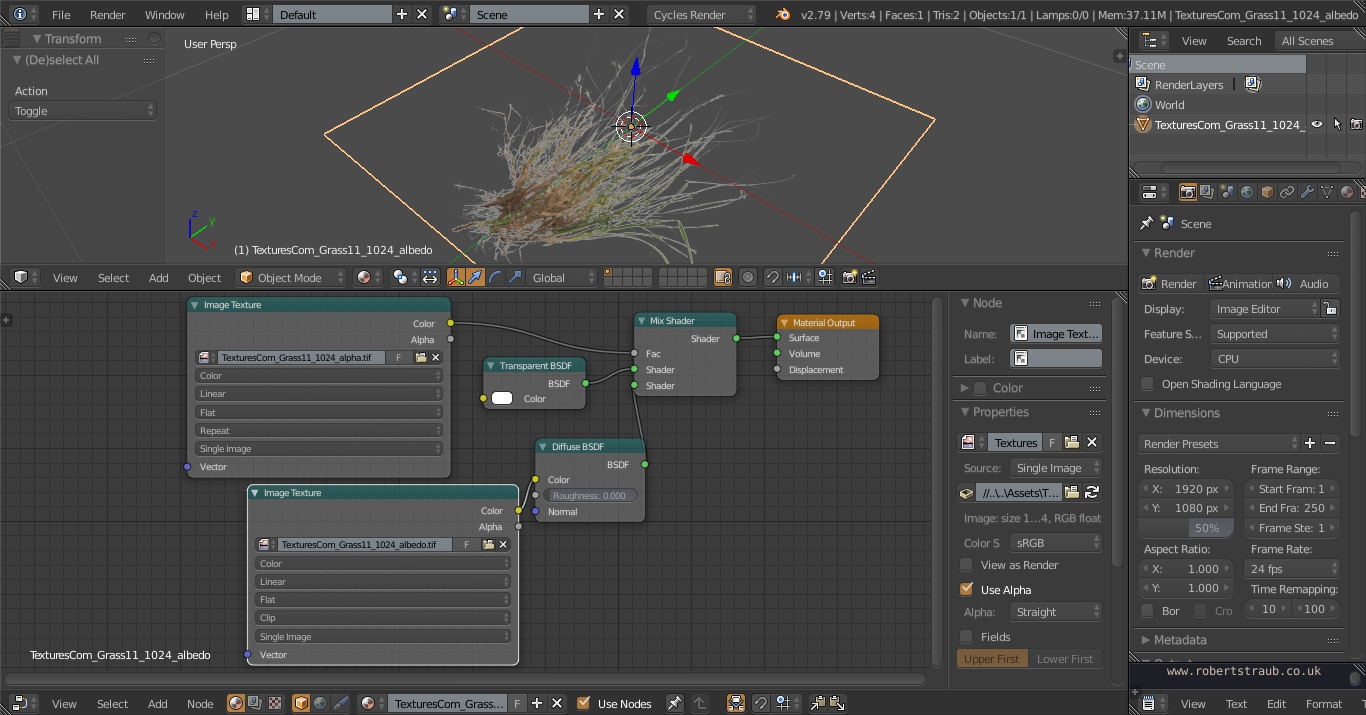
The end result when the alpha is fixed on the material.
Checking the 3D view should show the grass texture with the desired transparency.
Altering the grass
Now we have some grass in the scene, the object should be modified to bring more realism to the grass. Adding curves into the grass at various points makes the scene a lot more believable and realistic.
Begin by rotating the grass to be upright. Also reposition the grass to have just above the roots at the world origin. This can be done via the Transform Manipulators.
Adding loop cuts
Enter Edit Mode and add about 6 loop cuts using the Loop Cut and Slide tool going vertically (along the Z axis).
Do not shift the loop cuts, click to accept the positions or press Escape to cancel this step. If there are faces that have no visible parts of grass on them, delete them.
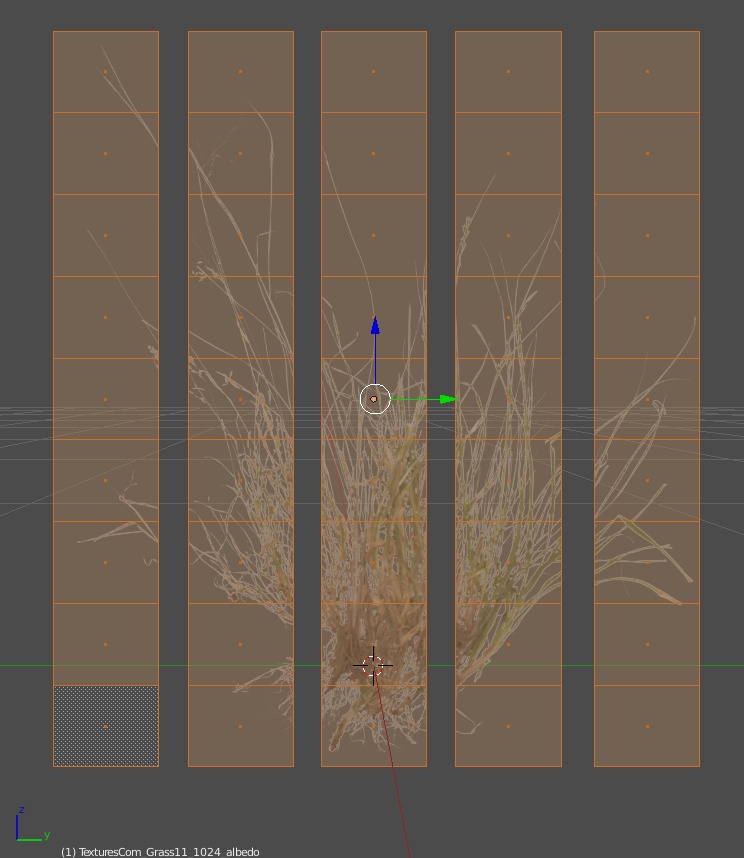
Next, add 8 or more loop cuts again but this time vertically (along the Y axis).
Separating sections with RIP
Now we have the whole grass part cut up into sections, next we need to separate the vertical sections so we can bend them individually. To allow this we will use the Rip tool. Rip the mesh on the inner vertical edges. The end result will leave the sections separated, the image below demonstrates this but do not separate the pieces like this, leave them together.
The ripped mesh, separated to illustrate the rips.
Bending the sections with Proportional Editing
We want to add curvature to the sections we have created. Firstly enable Proportional Editing in the Connected mode. Change the Falloff Mode to Smooth. Using this, move the top face back or forward on the X axis to create a curve on the section. Experiment by rotating and moving different parts and by changing the Influence range. You should end up with something like this:
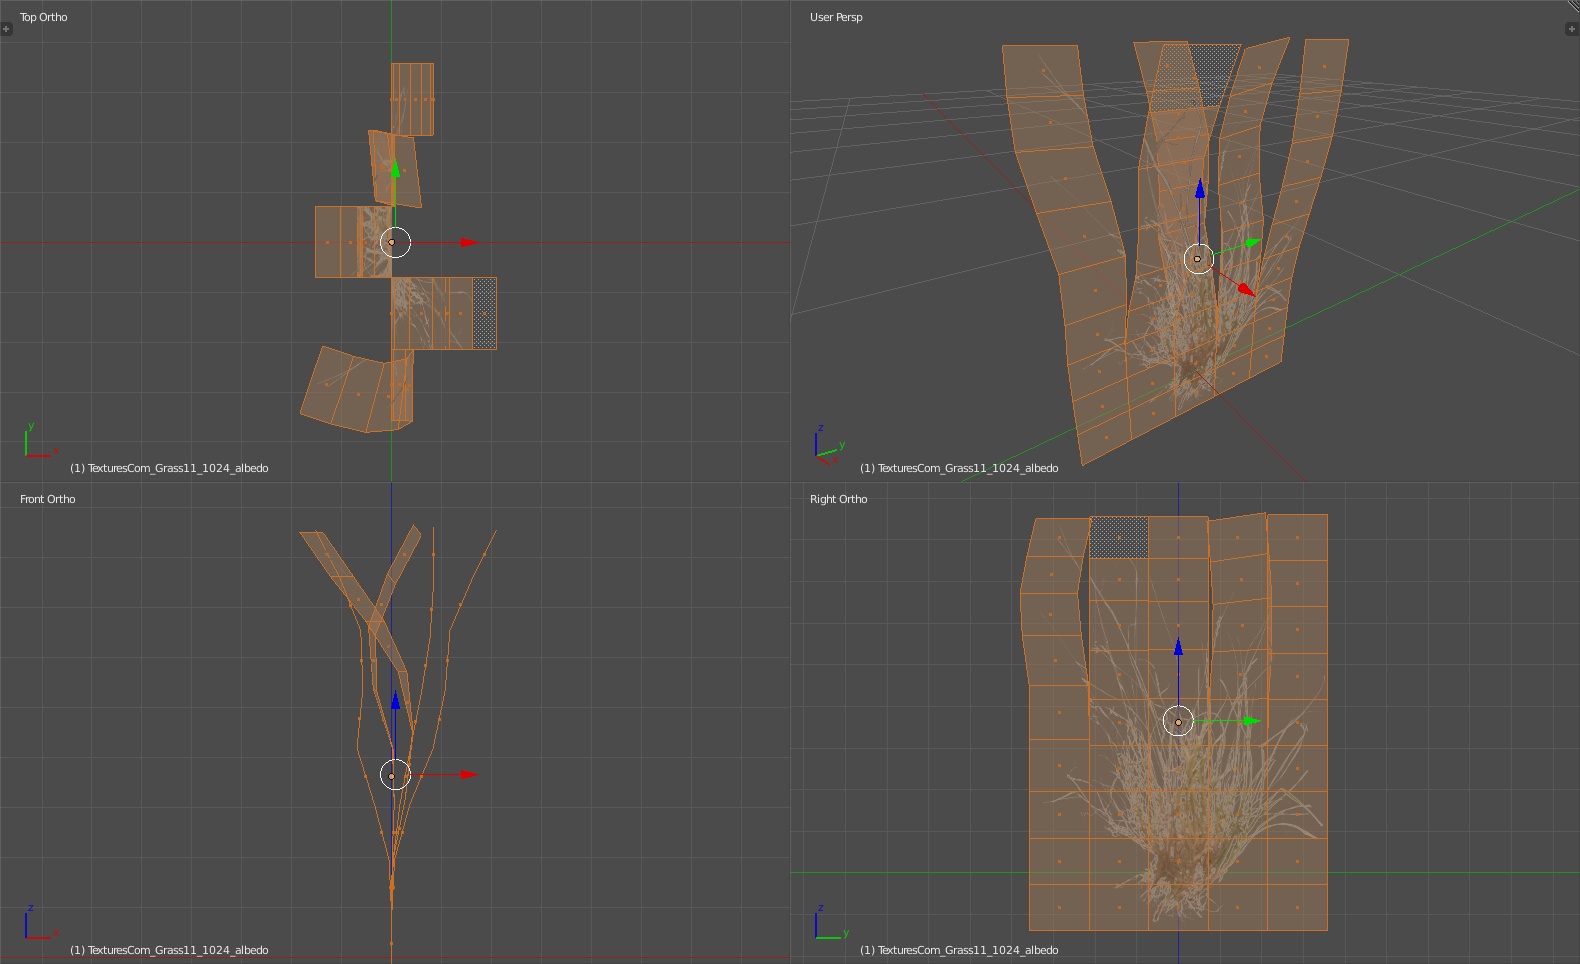
The grass mesh after the bending has been applied.
Now the next step is to duplicate all of the existing geometry (whilst in Edit Mode) then rotate the duplication by 45 degrees around the Z axis. Repeat this step on the new duplication another 2 times resulting in this:
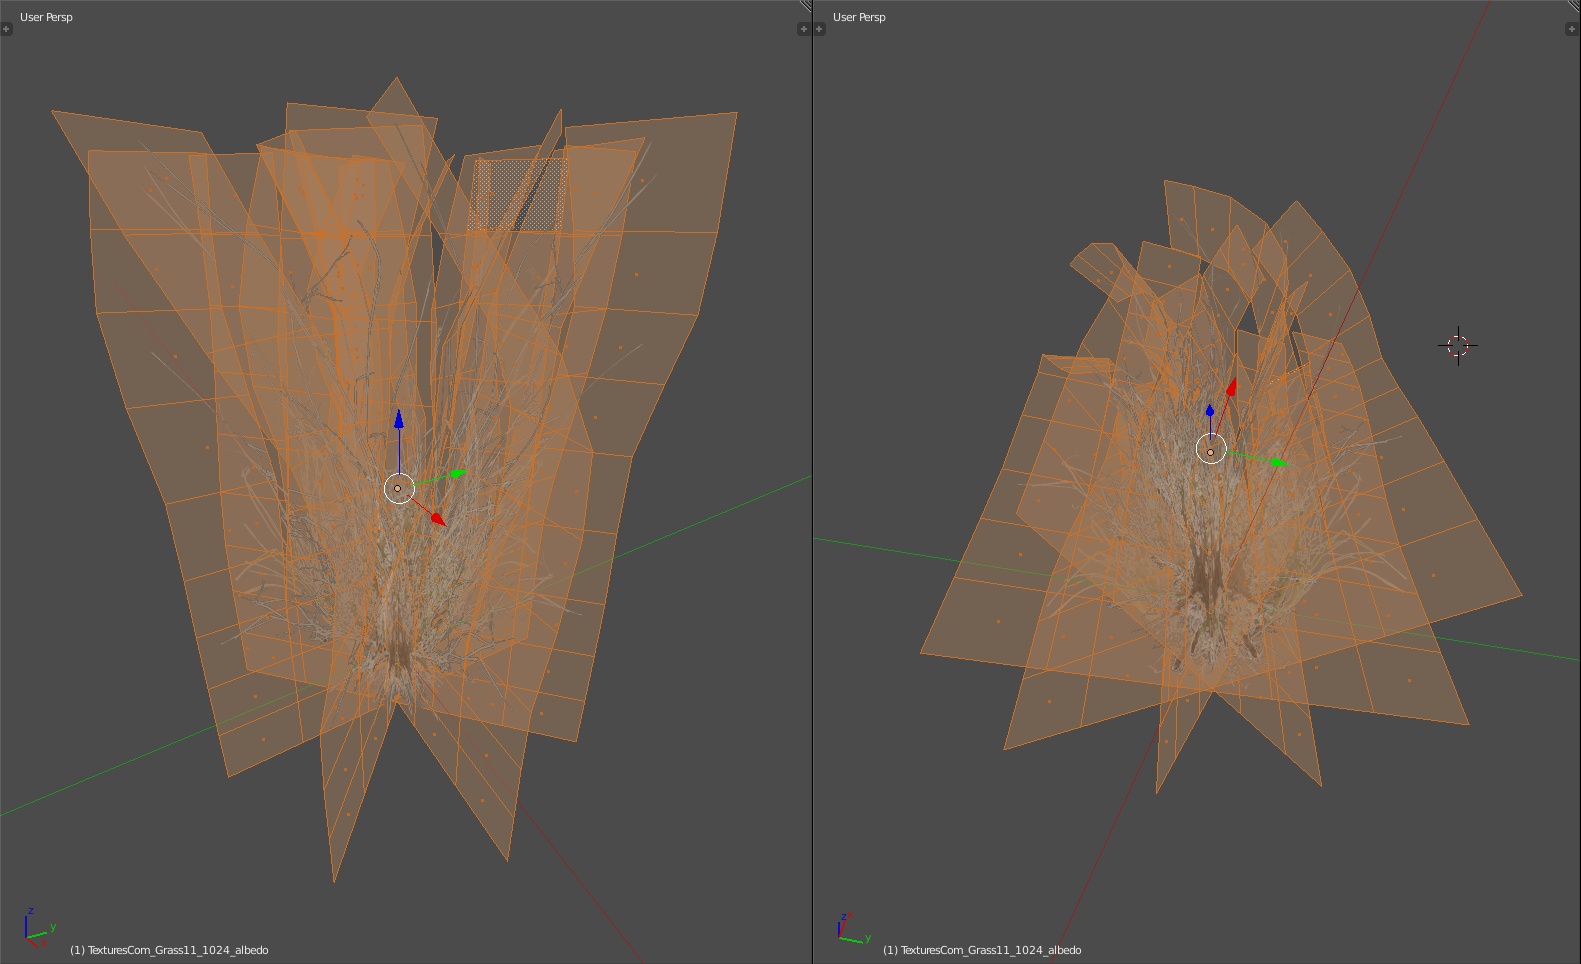
The Grass after the duplication’s
Adding the ground plane
Go to Object Mode and add a new Plane. The plane should be created at the world origin if the 3D cursor was not moved and therefore be positioned under the grass already (if not, move it to where it should be). Create a new material for the new Plane.
UV Mapping/Unwrapping
To allow our material to be displayed on the plane (or any mesh) we need to give the object a UV map. We did not have to do this for the initial plane as the Import Images as Planes plugin did this for us. To generate a UV map, we need to unwrap the mesh. As a plane is a single quad face this is very easy but more complex meshes will require work to produce good quality UV’s.
To unwrap the plane, go into Edit Mode with the plane as the selected/active object, select the only face, press U (or go to Mesh > UV Unwrap) and select Unwrap. The material we will create next should now appear properly on the plane.
The UV map can be viewed for a mesh by creating a new view/ changing a view to be the UV/Image Editor.
Material Setup
Now to set up the material on the plane, as this will act as the ground. Make a new material and open a Node Editor view. Remove the default nodes and add a Principled BSDF Node. Next we need to assign the texture files that we downloaded earlier for the ground. If you downloaded the one I used then set it up as I have in the image below.

The material node setup used for the ground planes, using the Principled BSDF shader.
If you are unsure then try to match the image files to the corresponding nodes using the name (Note that if you wish to use a Smoothness texture then you can use an Invert node to turn it into Roughness).
Once that is done, the basics needed for the scene area done! Next stage is to place out the grass and ground pieces in a desired way.
Scene Dressing
Create Other grass objects
To easily create grass with a different texture, duplicate the grass then duplicate the material by pressing the Add new Material plus symbol with the already existing grass material selected. On this new material simply swap out the textures on the Image Texture nodes.
Laying out the grass
Layout the grass objects on top of planes to create the desired scene. For the example render this is based on, I only needed to place a few grass objects and ground plane objects due to the camera angle used, however this can be altered to your liking.
Render setup
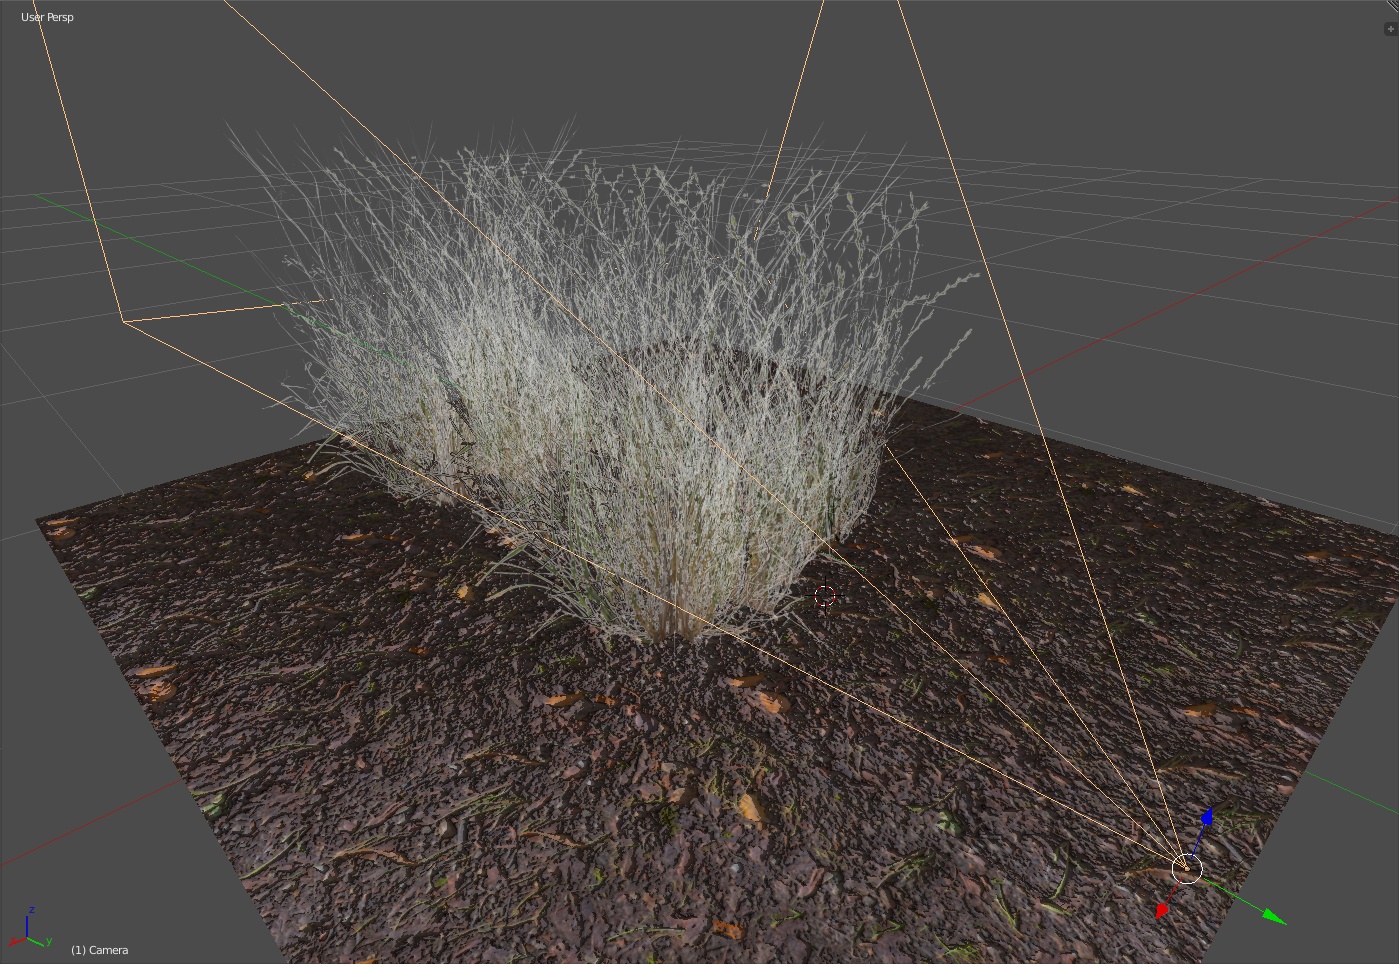
The final scene layout.
Now for the best part, setting up the scene to be rendered.
Adding the sky/world background
We need to add the HDRI we downloaded earlier (or use a Dynamic Sky) to provide lighting to the scene, provide reflections and a background for renders.
Go to the World Tab in the Properties panel. Under the Surface heading press Use Nodes. Change the node for Color using the dot icon to be Environment Texture and find the HDRI image download earlier on this node. Change the Strength property if needed to make the scene brighter or darker or add extra lights.
Changing the 3D View port shading to Rendered will show already the lighting provided by the Environment Background.
Camera Setup
Add a camera and align it as you wish. You can use the Align Camera to View command to help or view the camera (View > Cameras > Active) and use Walk Navigation (Shift + F).
Depth of Field
If you wish to have a depth of field effect, you can use the Depth of Field section on the Camera tab in the Properties panel. Use the Focus to select where the focus point is and alter the Aperture to get the desired effect.
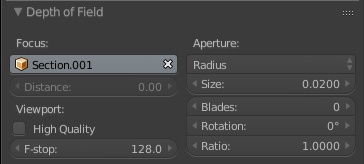
Depth of Field Settings
Rendering
Now its time to render with Cycles! If everything is set up to your liking you can go to the Render tab in the Properties panel or press F12. This will render a still image with the settings given in the Render tab.
Before rendering its best to view the Camera and change the 3D View port shading mode to Rendered. Ticking Border in the Dimensions section will make the 3D view only render the Camera border, speeding up the render time on the preview. Use this preview to make changes to the scene before rendering the scene with more samples.
Render settings
The initial render was done at 128 samples, more samples usually means less noise and better quality. The sample count can be changed in the Samples section (Render is for a render and preview is for the 3D rendered view).
Noise from renders can also be reduced by changing other render options (outlined here in the blender documentation) or using the Denoising option on the Render Layers Tab.
Potential Issues:
- Black rectangles appearing in parts of the grass
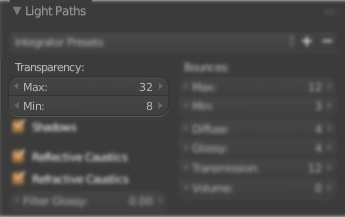
The Light Paths setting location
This is caused by the Max Transparency value in the Light Paths section being too low. Increasing this value will fix this issue.
Conclusion
This should now result in a good looking render similar to what was shown at the start! Hopefully this tutorial has helped you learn about rendering using blender and the Cycles render engine. If there are any issues or questions be sure to leave a comment or send me a message via e-mail or on twitter.